;)

;)
;)

;)
;)
;)

;)
;)
;)
;)
;)
;)
;)
;)
;)
;)
;)
;)
;)

;)
;)
;)
;)
;)
;)
;)
;)
;)
;)
;)
;)
;)
;)
;)
;)
;)
;)
;)
;)
;)
;)

Monitoring Amazon EC2
Overview
Nagios xi provides basic monitoring of Amazon EC2. This includes the measurement of the following items:
-
CPU Credit Usage
-
CPU Credit Balance
-
CPU Utilization
-
Disk Read/Write Operations
-
Disk Read/Write Bytes
-
Network In/Out
-
Network Packets In/Out
-
Instance Up/Down
Obtaining the AWS Security Credentials
You must first obtain an Access Key ID and a Secret Passkey from Amazon.
-
Log in to AWS with your admin user account.
-
Click on EC2 and select Running Instances.
-
Select the login name at the top and choose My Security Credentials.
-
On the Security Credentials screen, click on Create New Access Key.
-
Press Show Access Key to display on the screen. Copy the access key to be used below.
Using The Amazon EC2 Wizard
1. To begin using the Amazon EC2 wizard navigate via the top menu bar to Configure > Configuration Wizards and select the Amazon EC2 wizard. In the following screenshot you can see how the search field allows you to quickly find a wizard.


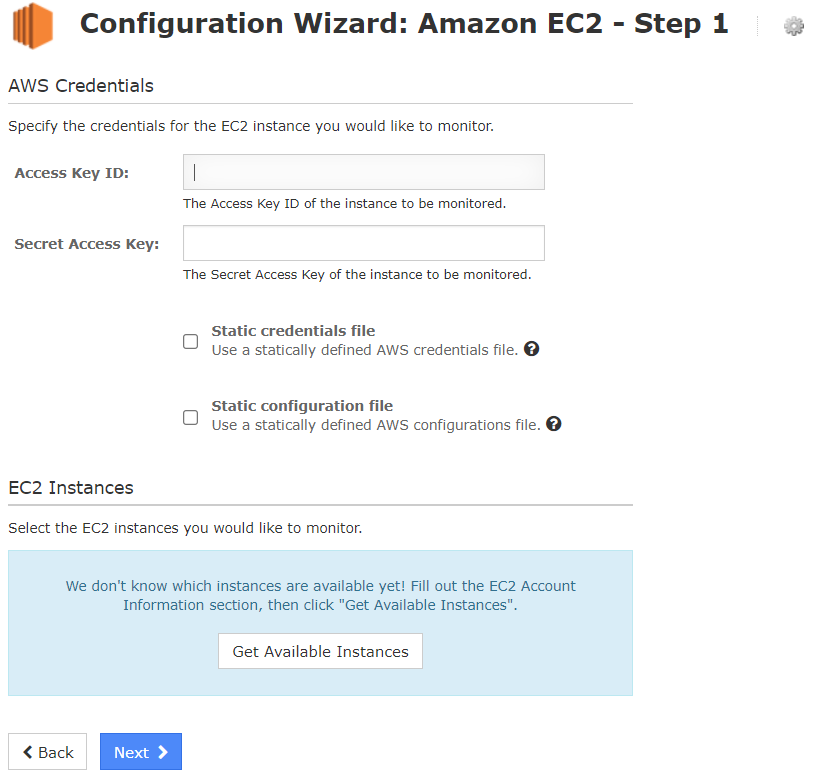
2. Step 1
-
Enter the Access Key ID and Secret Access Key you obtained above.
-
Click on Get Available Instances.
-
Select the instance you want to monitor.
-
Click Next.
3. Step 2
On this step you will configure all of the options for monitoring.
-
Enter a valid Host Name.
-
Select the metrics that you'd like to monitor.
-
You can adjust the warning and critical thresholds for each metric to suit your needs.
-
Click Next once you have selected all the required options.
4. Complete the wizard by choosing the required options in Step 3 – Step 5.
5. To finish up, click on Finish in the final step of the wizard. This will create the new host and services and begin monitoring.
Once the wizard applies the configuration, click the View status details for <Amazon EC2 HOST> link to see the new service that was created.


