;)

;)
;)

;)
;)
;)

;)
;)
;)
;)
;)
;)
;)
;)
;)
;)
;)
;)
;)
;)
;)
;)
;)
;)
;)
;)
;)

;)
;)
;)
;)
;)
;)
;)
;)
;)
;)
;)
;)
;)
;)

Overview
This KB article describes how to add quick links that will open a PuTTY SSH session to a remote server.
The links will appear on the Host Detail or Service Detail pages in the Quick Action section near the "Enable/Disable notifications" and "Schedule a forced immediate check" actions.
They work similarly to other URL schemes, such as mailto: links opening your email client automatically.
This KB article is intended for use by Nagios xi Administrators and end-users who want to provide quicker access to their remote servers directly from the host or service details page.
This document only covers Windows workstations, instructions for Mac and Linux workstations can be found online. The section on configuring Nagios xi is platform-independent.
Preparing the Windows Workstation
In order for Windows to recognize a custom link format (in our case, ssh://address) you must first make some changes to the registry.
If you have not done so already, download PuTTY from the following site:
http://www.chiark.greenend.org.uk/~sgtatham/putty/
It is recommended that you download the "Windows MSI Installer".
It is assumed that PuTTY will be installed in C:\Program Files (x86)\PuTTY\ as the steps in this KB article rely on this location.
Open a Command Prompt as an administrator and type the following commands:
reg add HKEY_CLASSES_ROOT\ssh /f /ve /d "URL:ssh Protocol"
reg add HKEY_CLASSES_ROOT\ssh /f /v "URL Protocol" /d ""
reg add HKEY_CLASSES_ROOT\ssh\shell\open\command /f /ve /d "\"C:\Program Files (x86)\PuTTY\putty_util.bat\" %1"
Next we will make a batch file that will be run. In the same command prompt already open type the following commands:
cd "\Program Files (x86)\PuTTY"
notepad.exe putty_util.bat
This will open Notepad and will prompt you if you want to create a new file, click Yes. Now paste the following into Notepad:
@echo off
set var=%1
set extract=%var:~6,-1%
start "" "C:\Program Files (x86)\PuTTY\putty.exe" %extract%
exit
Save the file and close Notepad.
Windows is now configured to treat ssh:// addresses as being opened with PuTTY.
Clicking any such link from now on will open a PuTTY session to the address specified in the URL link.
Configuring the Actions Component in Nagios xi
The next step is to configure Nagios xi to display the proper ssh:// link for each host or service.
Log into the Nagios xi web interface
Click the Admin menu and under System Extensions click Manage Components
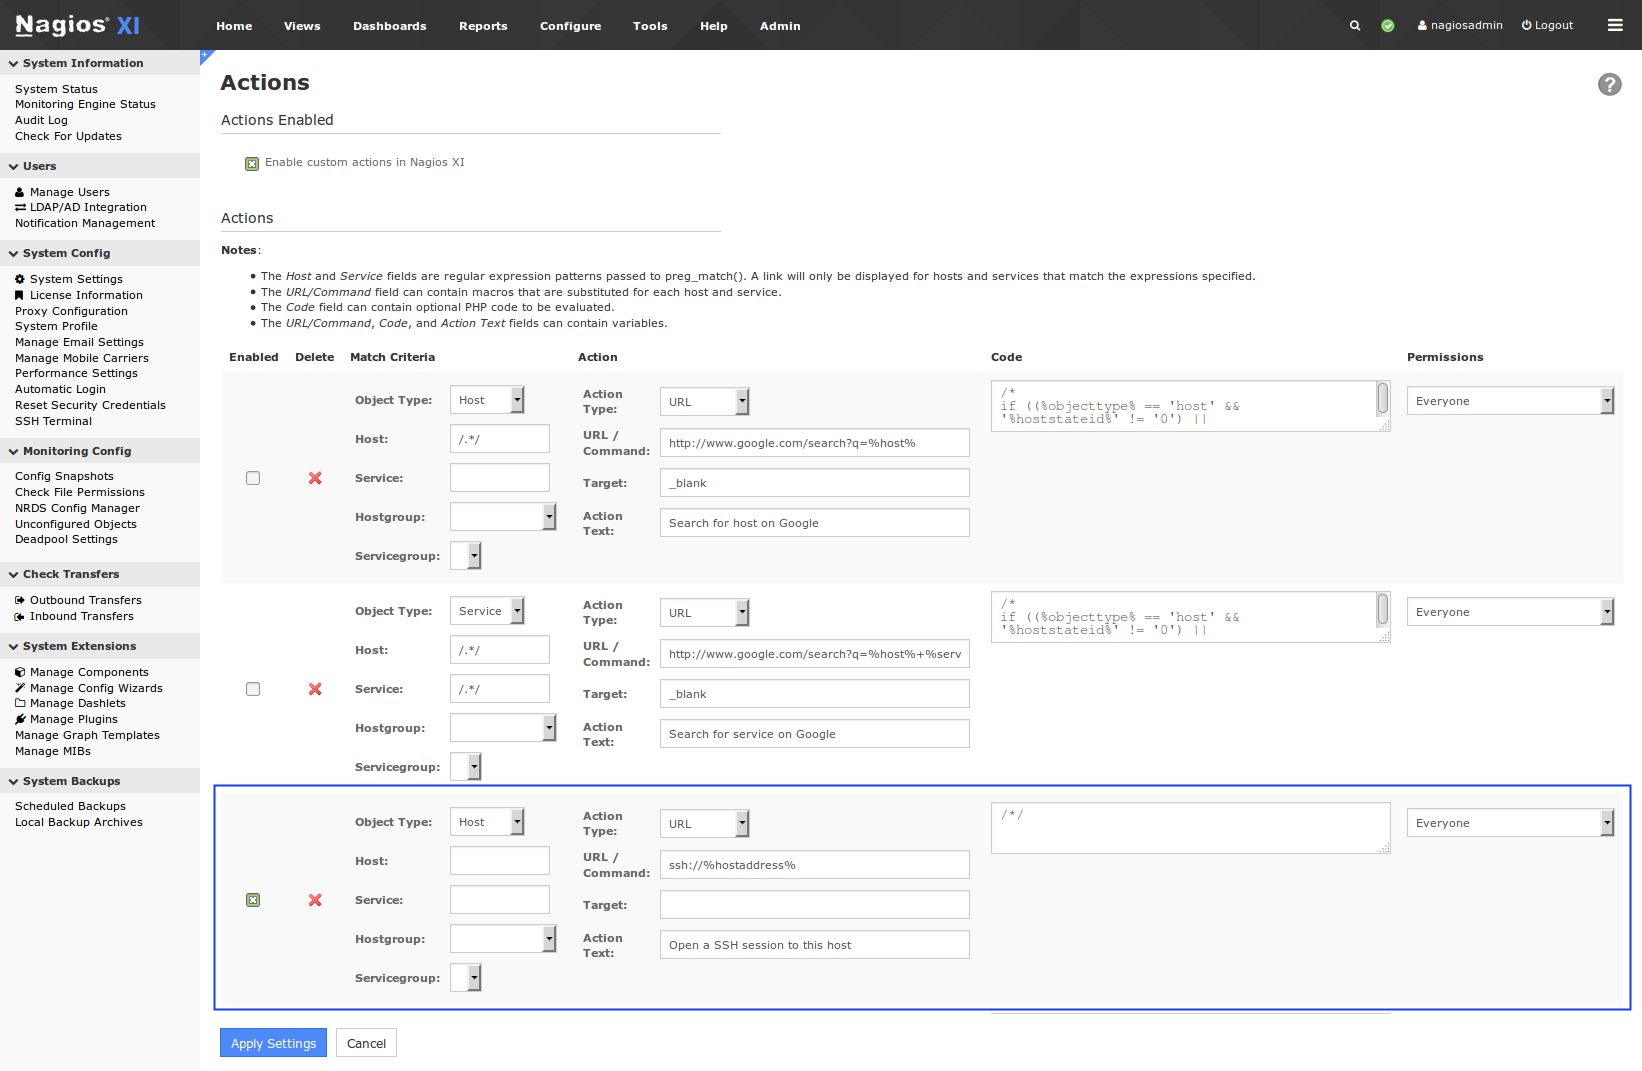
Click the Settings icon for the Actions component
Make sure to check the Enable Component box at the top of this page
For the third item "Any"
Check the checkbox
Object Type: Host
Action Type: URL
URL/Command: ssh://%hostaddress%
Target: _blank
Action Text: Open a SSH session to this host
Code box: /*/
Click the Apply Settings button
You'll see this has now been added as an addition item:
Using the SSH Link
From now on, your Host Details page will have a link in the Quick Actions area that will open a PuTTY session to the host's configured address.
You may be prompted to select an application to launch the link with, ssh should be the item selected in the list, check the box "Remember my choice for ssh links" so you are not prompted in the future.
The session can take both IP addresses and FQDNs, as long as your workstation has network connectivity to the remote server and can resolve the FQDN.
Adding the Link to the Service Details Page
If you would like to have the ssh:// link appear on the Service Details pages as well do the following:
Click the Admin menu and under System Extensions click Manage Components
Click the Settings icon for the Actions component
Find the action you previously added
Change the "Object Type" to Any
Click the Apply Settings button
Final Thoughts
For any support related questions please visit the Nagios Support Forums at:


